Verification of the performance of a coordinate measurement machine
In recent years the ISO 10360 has been the most important standard, with wider dissemination. The International Organization for Standardization (ISO) is a worldwide Federation of national standards bodies. International standards drafted the technical committees.
The ISO 10360 regulates the acceptance testing and verification of the performance of the machines of measurement for coordinates, known as MMC.
The body of standards ISO 10360 defines the criteria for acceptance and re-verification of measuring machines and adopt European national standardization authorities.
It consists of several parts, each one takes care of specific tests and testing:
- Part 1: Vocabulary
- Part 2: MMC to measure linear dimensions
- Part 3: MMC with four axles and turntable
- Part 4: MMC with measurement by scanning functions
- Part 5: MMC with systems of data with multiple tips
Certification and acceptance according to ISO 10360-2 tests
MPEAnd and MPEP
The Maximum Error Allowed (MPE) has to be specified by the manufacturer and defines the maximum errors And and P of the system of measurement.
And = error of indication of the longitudinal measurement
P = error of taking of point
These two parameters allow to establish the provision of the machine of relative measurement to the length measured (MPEAnd) and to the taking of a point (MPEP).
The two parameters can be declared by the manufacturer for the volume of complete measurement or for a volume reduced of the cual have specified the limits.
Indication of the measured length MPEanderror
And MPE = +/-(A+L/K)
Where:
To = constant inaccuracy of the machine or system expressed in microns
L = length expressed in mm
K = constant positive
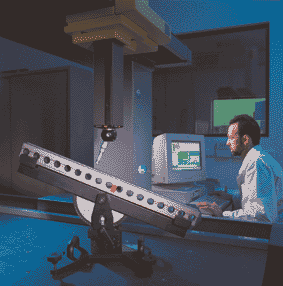
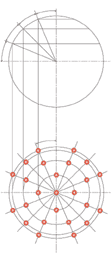
The test must be performed with 5 certified components (block patterns, or feet of King) of various lengths, 3 times to guide them in 7 different directions in the measurement volume, each measuring a total of 105 measurements (Fig.1).
Error pointPMPE decision-making
Verification of benefits of digitization
The benefits of digitizing is determined by the parameters Ti, j and t:
T = scanning error
(I) = intensity of points, high (H), low (L)
j = predefined route (P), not predefined (N)
t= time spent for the test in seconds
The manufacturer of MMC can specify the maximum allowed Error for the benefits of digitization according to the following combinations:
MPE,THP, MPEBPD,THNMPE, MPETLN
Density of points | Default route | Not predefined route |
High | THP | THN |
Baja | BPD | TLN |
Scanning with high density of points is particularly significant in the scans to define the error of the form, for example in the case of the redondeces.
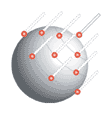
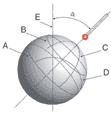
The error of scanning is verified digitizing a ball of calibration by four sections defined in the time established by the manufacturer. The results of scanning define the Center and radius of the ball. The error Ti, j is calculated as the band of dispersion of the radius of the ball, defined by all the points of digitization.
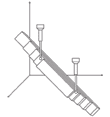
a is the angle that defines the inclination of the transducer on the Z axis of the measuring machine. Please take an angle of 45 degrees.
Benefits of digitization of the MMC are accepted if:
- the error Ti, j is not superior to the MPET(I), (j) specified by the manufacturer
- the difference between the calculated radio and half of the registered diameter of the ball is not greater than the MPETi, j
- the total time spent for the test is not superior to t as specified (Fig.4).
Verification of the performance of a MMC according to ISO 10360-5
In the case of a fixed with multiple tips head parameters are:
MPEMF,MSMPE, MPEML
Where:
MF = shape (sphericity) error
MS = error of dimension (diameter)
ML = error of position (X and Z Center)
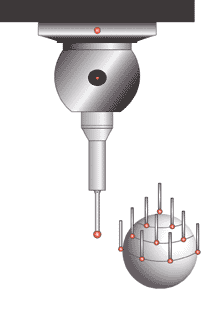
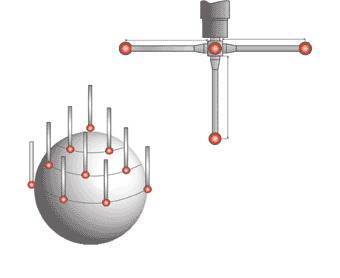
The verification procedure is to measure the ball of calibration with the 5 tips that form the head (which must have the same length) taking 5 points each. The calculation of the three errors MF, MS and ML has to use the 125 measured points (Fig. 5).
AF,ASMPE, MPE ASMto the
Where:
AF = shape (sphericity) error
AS = error of dimension (diameter)
To the = error of position (X and Z Center)
The verification procedure is to measure the ball of calibration in 5 positions of the head (perpendicular to each of them) taking 5 points each. Calculation of three AF, AS errors and the need to use the 125 measured points (Fig. 6-7-8).
