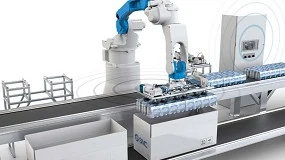
Applied metrology coordinates in his workshop
The pioneers of the mechanical manufacturing knew that, the harder they come the pieces to their ideal dimensions, it would be better adjustment between if and its operation. They knew that the dimensional information obtained during the process of measuring the piece could be used as a checklist of the conditions of the manufacturing process. If a hole was diverted from its Center, there was a reason. The precise dimensional measurement could indicate the path to the solution.
The practical necessity of measuring the pieces accurately was the catalyst (d) the development of a system of precision measuring instruments such as the gauge, the micrometer, height gauges and other devices. All the tools used to measure the dimensions parts, coordinate measurement machines (MMC) are the they have increased capacity.
Coordinate measurement machines acquire dimensional information detailed moving a transducer through the surface of the piece of work. Most of the MMC acquired the data using a transducer that detects contact with individual points of the work piece. This technique measurement of individual points can collect data, in general, to speed limits of 50 or 60 points per minute (speeds) considerably greater than those obtained with manual instruments of (measurement).
The MMC as tools for process control
What makes valuable metrology by coordinates as a tool of process control is that it can be used for accurately measuring objects in a wide range of sizes and geometric configurations, and discern the relationship between different properties of a piece of work. This flexibility, and the speed of the comparative measurement for coordinates operation with the techniques of flat surfaces and gauge fixed, meaning that the the measurement results can be used to refine a way economic applications of process of manufacture, as well as analyzing the the same trends.
The difficulty with the Metrology by coordinates, despite its undoubted It was worth, it has been measuring routines had to be frequently performed offline by specially trained technicians who were retired manufacturing operations. Inspections outside line This type became more a tool of control and quality assurance to verify the mounts or discover pieces that do not they meet specifications before being sent to customers in a real control of the process. With the introduction of control techniques statistical processes, on the other hand, quality technicians could use the dimensional data acquired by the MMC to study trends of not accordance and offer this analysis of manufacturing personnel. At the same time, the production staff uses this information to correct the variations of the process that produced these no-conformidades. In any case, these corrections process occurred often after pieces produced were discarded or processed to conform to the specifications.
 |
This machine for measurement of horizontal arm and direct computer control has built to perform a wide range of measurement tasks in the Workshop. These operations include the inspection of prismatic parts and thin-walled (like body of automobiles, and subsets), the automatic verification and free-form surfaces manual operations continuous scanning for copying of dies and molds, and operations of "marked as rejected". |
 |
In the workshop you can install large MMC type portico, integrated with equipment already existing handling of parts, to allow the manufacturer to the Rapid measurement of extremely large high pieces of accuracy and repeatability. |
 |
This MMC's workshop is the first one series of flexible custom systems built to provide measurements and inspection in production environments. It uses a network of thermal sensors placed in critical areas of the machine and a thermal compensation software an advanced algorithm to extrapolate values expansion and distortion from the sensor data. In this way, the influence of the temperature is cancelled in a wide range of conditions |
Transfer from the MMC to the workshop
During the last two decades there has been a trend towards the speed, flexibility and accuracy of the MMC integration with the operations of the workshop. One of the factors that has driven this trend is the growing demand for a production with such tolerances that even small differences in process can produce unusable parts.
The measurements have been integrated more and more with the process of machining. For example, transfer lines has joined physically to the line a station of measure. In other cases, the integration the measure has been provided by some types of mechanism of transfer, such as guided vehicles, carts, devices of handling or air conveyors, transferring parts from the machine tool until the MMC for inspection.
The advantage of inspections in workshop is that you placing the inspection dimensional in the vicinity of manufacturing operations is exercised a greater control over the process that when data are acquired in a location remote. The increase of control reduces the likelihood of producing parts out of tolerance, which means fewer rejections and reprocessing.
There is also other benefits. The measurement integrated in the workshop is conducted usually by the operators of the machines, which reduces the need for Special inspectors. In addition, the measurements in workshop can be used to compile historical data bases of behavior of the machines, tools, parts, palettes and fixations during the actual process of machining.
Measuring machines by coordinates used in these applications have the advantage of being flexible. In other words, a simple change of software program can be used to inspect pieces with different dimensions, and also bindings, palettes and tools.
 |
Interfaces for the software (to the) (measured from the client) are particularly useful in installations of machines measurement of workshop, especially when families are inspected for pieces. Instead of writing a new program for each piece within a family, a graphical interface can be configured to ask questions to the operator help software to determine what elements should be measured. |
How to correctly install a MMC workshop
The integration of the MMC workshop has been a technological challenge for manufacturers. The aim is to ensure a high performance accuracy at a speed compatible with the production flow.
The main obstacle is the variation of temperature and the effect that This is the piece of a measure and on the machine of measure. A first solution to this problem was the isolation of a machine MMC traditional to protect against thermal gradients and prepare the environment inside the enclosure to maintain constant temperature. In practice, This solution is locked to the MMC in a laboratory environment. While this It is a good solution in some circumstances, it has the disadvantage of editability of production for accuracy. Lock the machine of measured in a controlled environment presents some difficulties in the load and Download the parts that the piece should be acclimatised to the temperature of the enclosure of action before the action.
A new approach is the compensation of thermal dilation and distortion with a mix of solutions hardware and software with a network of sensors located in critical parts of the structure of the machine. The sensors read the temperature on the structure of the machine and a powerful algorithm extrapolates the values of the dilation and distortion. With these data software is able to compensate for the current thermal state of the machine in such a way that the influence of the temperature variations are almost cancelled for a wide range of conditions. The result is that it is possible to make dimensional inspection with an accuracy comparable to the laboratory, while working in a workshop environment.
The software makes easier integration
Although the hardware is essential for the functioning of the machine of measurement for coordinates on the workshop, the software plays a role not less important.
The MMC software has been refined in such a way that they do not require knowledge or experience in programming to implement the more sophisticated programs. Practically, all the new software of MMC consists of standard programmes managed with menus and a set of help screens. In this way, the software for any particular procedure is very easy to use, and it can be adapted to individual client applications using a simple language instead of a specific programming language linked to a complicated operating system.
Currently, there is a wide range of software. For example, there are programmes for statistical control production, metal applications, programs for turbine blades and gears, among many others.
Combine design with manufacturing
A new generation of software is being developed to provide the flow of information that really link the role of design with the manufacture by the common language of metrology. This new software provides a bridge between design and manufacturing through a common implementation of the design tolerances and between manufacturing and the design, providing information online and on-demand, sobre the process design engineers.
For example, new software is designed to serve as the interface directly with CAD/CAM and off-line inspection systems, of so that CAD models need not be translated when it they are loaded to the inspection system. Thus, both the team of design and manufacturing You can make an accurate and consistent analysis of the tolerances that the manufacturing system must be maintained to determine a way complete and unambiguous compliance with specifications.
Most of the software of measurement and inspection available today is manufacturer-specific, and does not interact easily with others systems. However, the next generation software adapts to any stage of the manufacturing process. The operator interface This new software will be designed to autoadaptarse the type of measuring device you are using. It will recognize if the operator is using a manual instrument, as a gauge, or a machine for measuring coordinates with all its functions. The software only submit the functions required for applications that they are to be used. This function will allow users selection tool as most appropriate for each task, maximizing the use of measurement equipments. Also added value to all systems of measurement, making them more integrable with the manufacturing process in place of isolate in laboratories of inspection.
The new software, including the currently available development has often with open architecture and object-oriented. This means that the users can be added to the system its own procedures of inspection and analysis packages. The basic system of software also can as is metrological developed by third-party packages. The potential for development new ways of approaching the measurement and inspection applications is virtually unlimited.
The scan adds new dimensions to the measurement in the workshop
As the manufactured pieces become smaller and the required tolerances are lower, it is necessary to acquire and analyse more data in order to determine the viability of the manufacturing process. The MMC with scan functions provide the means to do so. The scan It is simply a way to automatically collect a set of coordinates of points defining exactly the shape of the piece of work.
The role of sweep is considered exclusive sometime in the high-tech manufacturers, because the MMC capable of scanning and the software to manage it were costly and difficult to purchase. However, Today, advances in software and sensor technology have made machines MMC considerably more affordable.
The new sensors combined elements of technology point of view, of video and laser devices that can quickly sweep forms complex and surfaces, and collect accurate dimensional data.
Some of these sensors can be read up to 20,000 points per second with extreme accuracy. Combined with these sensors will be some powerful machines mathematics that will quickly analyze losla large amount of data dimensional that these systems can generate.
The integration of metrology by coordinates in the workshop does is a? concept that will remain, or will be just a passing fad?
It is safe to the nearest be dimensional inspection process, more useful they are the possibilities of control to the user. The key points are the accuracy and the productivity. The MMC that reach the market are faster, more accurate and more affordable than its predecessors in a just a few years. In addition, they have been designed taking into account the integration with the workshop. The greatest value of metrology in the workshop is not only the possibility integration with the process, but the Union allows between the objective the role of manufacturing and design. This is the qualitative leap that will give continuity of quality improvements that are an integral part of the design, the engineering and manufacturing.
Choice of a system of measurement workshop
There are some important considerations that must be taken into account to the When choosing a measurement system to be integrated within the Workshop operations. The most important are:
- Reliability. The measurement system is robust enough for? coupled to production systems? This is essential if the systems of production will become dependent on the measurement system for the control of the process.
- Productivity. The measuring system must be fast enough to support the production of machine tools.
- Environment. It is possible that additional investments are required to integrate Indeed the system of measurement in production operations. By example: is it necessary to dampen vibrations? Does the system require? Special foundations? We need a system of manipulation? A measurement systems provider can help you to assess your application specific.
- Ease of use. The measuring system must be easy enough to use by non-technical personnel. However, the availability is important training by your provider to update the knowledge of the operator, so that you can get the most out of the system.
-
Maintenance. Its current operations? maintenance they are sufficient to support the metering system? Some measurement systems providers offer preventive maintenance and calibration services to help meet the needs additional maintenance personnel.
| The advantage of inspections in workshop is that you placing the inspection dimensional in the vicinity of the operations of manufacturing, will exercise a greater control over the process that when data are acquired in a location Remote | The next generation software adapts to any stage from the manufacturing process |
| The potential for development new ways of approaching the measurement and inspection applications is virtually unlimited | The new MMC are faster, more accurate and more affordable than its predecesorass. In addition, they have been designed taking into account the integration with the workshop |


