The assurance of the everyday reliability of the MMC allows optimization, planning and savings in calibrations
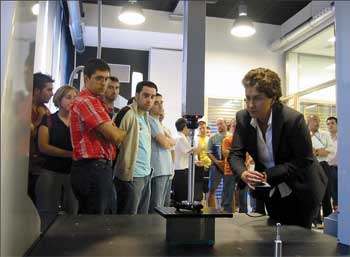
Check-master is a device of control of the reliability of the MMC, designed to be easy, fast and automatic (a complete test can be less than 10 min.). The system carries out a test in fully automatic mode, and allows a control and daily or weekly assurance of the machine, preventing possible incidents or evaluating the consequences of conflict collisions. It also allows for the storage of data and provides tools that allow to optimize the calibration cycle.
Check-master replaces with enormous benefits for frequent checks, bulky devices such as the "stepgauge", the barcode pattern or other utensils such as plates, prisms or areas.
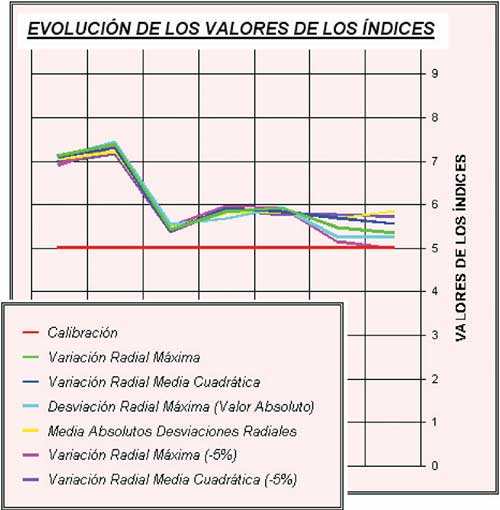
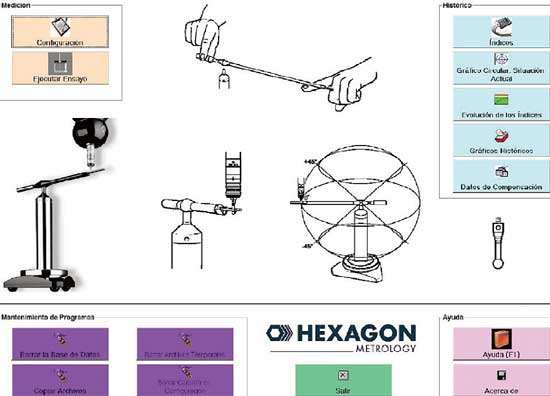
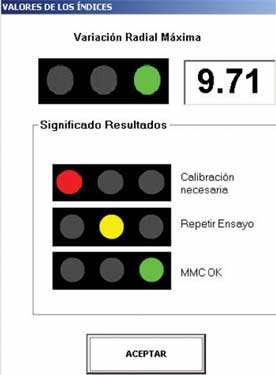
Once the cycle of measurements with the device, designed software supplied automatically, an indicator of reliability of 1 to 10 that indicates is the MMC with respect to the original specifications of the manufacturer. 5 Above indicates that it is within their specifications. In addition to the indicator of reliability, a traffic light indicates whether the system is "OK" (green), "CRITIC" (yellow), "Outside specifications" (red). Different graphic tools included in the package, allow to view also directly the evolution over time, and the detail of each of the tests carried out.
Applications and advantages of the device are multiple, as his execution is very quick, allows control and daily or weekly assurance of the machine, preventing possible incidents or evaluating the consequences of conflict collisions. The system allows an analysis of the MMC and thus optimize the periods of maintenance and calibration with improved reliability and reduced maintenance costs by removing unnecessary calibrations. If there are several machines you can compare the different qualities of the equipment and its evolution over time
While the system provides a clear and synthetic information, there are complex algorithms of calculation which consider different variables such as the results of the trial, the original specifications of the machine and other parameters for processing.
The Check-master software has been the fruit of a joint development between the Metrology and laboratory Metrotecnia of the technical school Superior of engineers industrial of Madrid (LMM-ETSIIM) and the engineers of Hexagon Metrology at Spain. It is necessary to note the wide experience of the Metrology Laboratory of the Faculty of engineering of Madrid in the development of procedures for calibration of measurement equipment, currently being Spanish dimensional metrology laboratory whose accreditation (today ENAC, formerly SCI) is more ancient (1983).
Main features
- System installation and simple configuration.
- The execution of the test is carried out quickly and automatically.
- The test results for easy interpretation.
- The system boasts maximum flexibility.
- The system is flexible, robust, occupies very little space and is quite manageable.
- Verification in accordance with the specifications relating to the standard ISO-10360/2.
- It allows to control several machines, with independent archives.
- It works with practically all the machines and software of the market.
Benefits and solutions
- It allows to control easily the repeatability and the capacity of volumetric measurement of the MCC.
- It provides clear information on the status of the MMC on your specifications, which translates into an effective quality assurance.
- Avoid making unnecessary calibrations and allows to determine when it is necessary to carry them out.
- By its performance reduces maintenance costs and production rejections.
- It facilitates the processes of preventive and predictive maintenance, guiding the user on what actions to carry out depending on the outcome of the analysis.
- It provides a detailed analysis of the evolution of the behavior of MMC and the anticipation of potential problems.
Operational operating
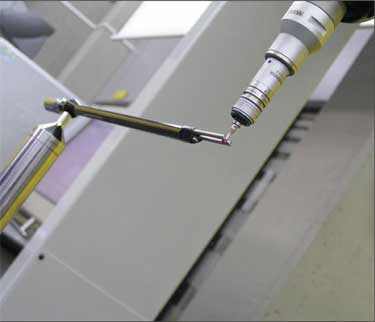
Defined once the configuration is to run the trial, which will guide us through a series of messages in the window of the measurement programme.
After the execution of the test, the program performs the calculation of the results and shows which are representative of the capacity of the MMC indexes.
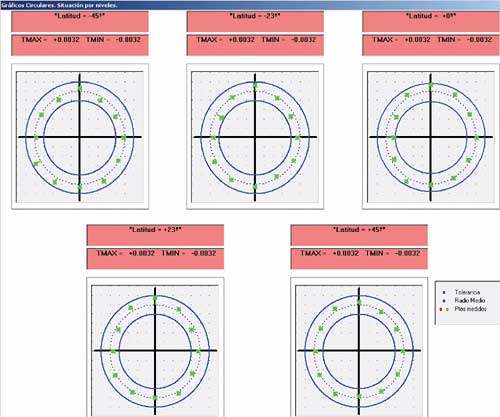
At the same time also can display various graphics with the data on the situation of the measured points at different levels, as well as information on the evolution of rates over time. With this information the user will be criteria for interpreting the changes in the behaviour of the MMC.
Verification tool
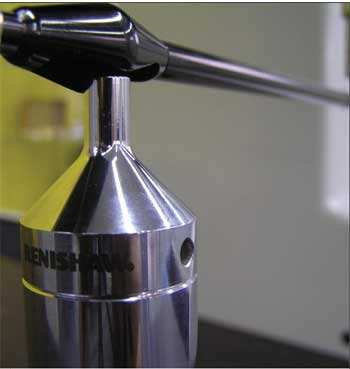
The rod to run the trial sits in a field of Ruby's precision in an adjustable turret. Support allows a very precise pivotamiento long alo of 360 ° horizontally and +/-45 ° vertically. At the end of the rod is a ball of carbide of tungsten and guides including the tip of the probe is inserted. The rod is moving on a truncated spherical surface of RADIUS R.
Check-master performs the calculation of the average retrieved radio in the trial and the deviations to this radio, as well as indices representing the State of the MMC in reference to your specifications.
It is also possible to evaluate the repeatability by comparing the results obtained in the same positions.
