Dimensional and geometrical tolerances
1. General considerations
In the design of industrial products, the general geometric definition of the pieces is done via the caption. Individual pieces can be considered a combination of primitive geometric forms or complex shapes. Primitive shapes mimic prisms, cylinders, cones, Bulls, areas etc. Complex shapes are those parts of the pieces that are bounded by surfaces constructed on the basis of B-spline curves, NURBS, etc. The express limits the size and the three-dimensional location of these forms in the composition of the piece. Manual design starts with a sketch, in which the forms are defined according to the capacity of visual approach of the author. Below is the drawing scale, bounded. This representation attempts to save a proportionality between representation and reality. Most of the current designs are generated in CAD environments and this method is aimed at creating a three-dimensional model. In this model, sometimes called "virtual" forms are perfect. In reality it should not be forgotten that it is impossible to obtain perfect forms. The approach to the perfection depends on the functional requirements of the pieces and also the cost limit production. The pieces that closest to the perfect way ones usually get very expensive.
2. Dimensional tolerances
In order to classify and assess the quality of the actual parts have been the dimensional tolerances. This establishes an upper bound and a lower, which should be the good parts. Under this approach, all the desired dimensions, also called nominal dimensions, must be accompanied by a limit that define you a field of tolerance. Many levels of the levels, are these explicit limits, below the nominal value.
All those levels which are not accompanied by dimensional limits explicit will have to comply with the requirements of the rules of General tolerance (DIN 16901 / 1973, EN22768-2 / 1993 etc) that are defined in the field of design, in the proximity of the box. After the measurement process, following the meaning of the dimensional tolerances industrial parts fall into two groups: good and bad. The first group includes those parts, whose dimensions are within the field of tolerance.
Those of the second group can be subdivided in bad due to material excess and bad default material. In manufacturing material removal technologies the pieces of the first branch could be improved, while the second branch in general are unrecoverable.
3. Geometrical tolerances
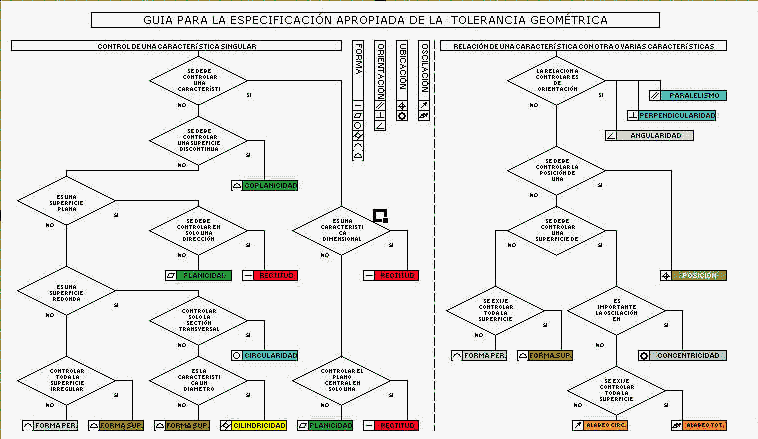
The geometric tolerances are specified for those parts which have to fulfil important functions in a whole, that depends on the reliability of the product. These tolerances can control individual forms or define relationships between different forms. The following classification of these tolerances is unusual:
- Primitive forms: righteousness, for cutting, roundness, cylindricity
- Complex forms: profile, surface
- Orientation: parallel, perpendicular, tilt
- Location: concentricidad, position
- Oscillation: circular radial, axial or total
Assess the fulfilment of these requirements, additional to the dimensional tolerances, requires means metrological and complex measurement methods.

To advance the understanding of these tolerances see: ASME 14.5. 1 M / 1984 ISO 8015 / 1985 UNE 1-121 / 1991 TrON 2001


